cell-2

Indulge in Winter’s Warm Embrace: Love-infused 6 Snacks for the Ultimate Comfort

Indulge in Winter’s Warm Embrace: Love-infused 6 Snacks for the Ultimate Comfort

Introduction:

As winter blankets the world in a chilly embrace, there’s nothing quite like cozying up with a good book, movie, or your favorite blanket accompanied by some delicious snacks. Embrace the season with a delightful array of winter snacks that will not only warm your taste buds but also add a touch of comfort to those cold, wintry days. Here are six mouthwatering snacks perfect for the winter season, Indulge in Winter’s Warm Embrace: Love-infused Snacks for the Ultimate Comfort.

Indulge in Winter's Warm Embrace: Love-infused 6 Snacks for the Ultimate Comfort
Indulge in Winter’s Warm Embrace: Love-infused 6 Snacks for the Ultimate Comfort

Spiced Hot Chocolate with Marshmallow Dunkers:

Start your winter snacking journey with a classic but spiced-up version of hot chocolate. Add a dash of cinnamon, a hint of nutmeg, and a swirl of whipped cream to your hot chocolate for an extra layer of warmth. Pair it with marshmallow dunkers – soft marshmallows skewered on sticks, ready to be dipped into your rich and spiced hot chocolate.

Roasted Chestnuts:

A winter classic that never goes out of style – roasted chestnuts. Pop these little treasures in the oven and savor the irresistible aroma as they cook. The nutty, earthy flavor of chestnuts makes them a perfect winter snack. Peel away the warm, toasty skin, and enjoy these delights while wrapped in a blanket by the fireplace.

Savory Parmesan Rosemary Shortbread:

Add a savory twist to your winter snack collection with Parmesan rosemary shortbread. These buttery, crumbly delights are infused with the sharpness of Parmesan cheese and the aromatic essence of fresh rosemary. Baked to perfection, they make for an elegant snack that pairs wonderfully with a hot cup of herbal tea.

Cranberry and Orange Scones:

Elevate your winter snacking experience with the sweet and tangy combination of cranberry and orange scones. These flaky pastries are bursting with flavor, thanks to the tartness of cranberries and the citrusy zing of oranges. Top them with a dollop of clotted cream or your favorite jam for an extra indulgent treat.

Winter Vegetable Soup with Cheese Croutons:

For a heartier snack, indulge in a bowl of winter vegetable soup. Packed with seasonal vegetables like carrots, potatoes, and butternut squash, this soul-warming soup is both nutritious and delicious. Amp up the comfort factor by adding cheese croutons – bite-sized pieces of toasted bread smothered in melted cheese, perfect for dipping into your steaming bowl of soup.

Gingerbread Energy Bites:

Satisfy your sweet tooth with a healthier winter snack option – gingerbread energy bites. Packed with the warm spices of ginger, cinnamon, and nutmeg, these bite-sized treats are not only delicious but also provide a quick energy boost. Made with wholesome ingredients like oats, nuts, and dates, they’re a guilt-free snack that captures the essence of winter in every bite.

Conclusion:

As the winter winds howl outside, treat yourself to these delectable snacks that bring both warmth and flavor to your cozy indoor haven. From spiced hot chocolate to gingerbread energy bites, these snacks are sure to make your winter days a little brighter and a lot tastier. So, gather your favorite blankets, put on your comfiest socks, and indulge in these delightful treats that celebrate the magic of winter.

Kokum Cooler is a wonderful summer drink that combines the tartness

Kokum Cooler: Crafting with Love for the Ultimate Refreshment

Kokum Cooler: Crafting with Love for the Ultimate Refreshment

Introduction:

Kokum Cooler is a delightful and tangy drink that originates from the coastal regions of India. Kokum, also known as Garcinia indica, is a small, sour fruit known for its numerous health benefits. This Kokum Cooler recipe is a perfect way to beat the summer heat and enjoy the unique flavor of kokum. Follow along to create this refreshing drink at home.

Kokum Cooler: Crafting with Love for the Ultimate Refreshment

Ingredients:

  • 1/2 cup dried kokum petals
  • 4 cups water
  • 1/2 cup sugar (adjust to taste)
  • 1/2 teaspoon black salt
  • 1/2 teaspoon roasted cumin powder
  • A pinch of asafoetida (hing)
  • Ice cubes
  • Fresh mint leaves for garnish

Instructions:

Preparing Kokum Concentrate:

a. In a saucepan, add the dried kokum petals and 2 cups of water.

b. Bring the water to a boil, then reduce the heat and let it simmer for 10-15 minutes.

c. The kokum petals will soften and release their vibrant red color.

d. Remove the saucepan from the heat and allow it to cool to room temperature.

Straining the Kokum Concentrate:

a. Once the kokum mixture has cooled, strain it into a bowl, pressing the kokum petals to extract all the flavors.

b. Discard the strained kokum petals.

Sweetening the Kokum Concentrate:

a. In the same bowl with the strained kokum concentrate, add sugar.

b. Stir until the sugar dissolves completely.

Preparing the Kokum Cooler:

a. In a pitcher, combine the kokum concentrate, the remaining 2 cups of water, and a pinch of asafoetida (hing).

b. Add black salt and roasted cumin powder to the pitcher and mix well.

c. Taste and adjust the sweetness and salt according to your preference.

Serving the Kokum Cooler:

a. Fill glasses with ice cubes and pour the Kokum Cooler over the ice.

b. Garnish with fresh mint leaves.

c. Serve chilled and enjoy the refreshing Kokum Cooler.

Optional Tips:

  • You can adjust the sugar and salt levels to suit your taste.
  • Some people like to add a touch of roasted cumin powder for an extra layer of flavor.
  • For an even more refreshing twist, you can add a squeeze of lime juice.

Conclusion:

Kokum Cooler is a wonderful summer drink that combines the tartness of kokum with a hint of salt and sweetness. It’s not only delicious but also a great way to stay hydrated during hot days. Try making this Kokum Cooler at home and savor the flavors of coastal India in every sip.

Passionate Cooking: Mango Lassi the Ultimate Culinary Journey with Love

Passionate Cooking: Mango Lassi the Ultimate Culinary Journey with Love

Passionate Cooking: Mango Lassi the Ultimate Culinary Journey with Love

Introduction

we’ve started with a classic favorite: the Homemade Mango Lassi. This delightful Indian mango smoothie is the perfect embodiment of what we aim to achieve here – simplicity, flavor, and satisfaction.

Passionate Cooking: Mango Lassi the Ultimate Culinary Journey with Love

Ingredients:

  • 2 ripe mangoes (Alphonso or Ataulfo mangoes work well)
  • 1 cup plain yogurt (you can use Greek yogurt for a thicker consistency)
  • 1/2 cup milk (adjust to achieve your desired thickness)
  • 2-3 tablespoons sugar (adjust to taste)
  • 1/4 teaspoon ground cardamom (optional, for added flavor)
  • A handful of ice cubes (optional)

Equipment:

  • Blender
  • Measuring cups and spoons
  • Chopping board and knife

Instructions:

1. Prepare the Mango:

  • Start by peeling and removing the flesh from the ripe mangoes. Cut the mango flesh away from the pit. You can also use frozen mango chunks if fresh mangoes are not in season.

2. Combine Ingredients:

  • In a blender, add the mango chunks, plain yogurt, milk, sugar, and ground cardamom (if using). You can adjust the amount of sugar based on the sweetness of the mangoes and your personal preference. If you like it less sweet, start with a smaller amount and add more if needed.

3. Blend It:

  • Blend all the ingredients together until the mixture is smooth and creamy. You can also add a handful of ice cubes if you want your Mango Lassi to be colder and more refreshing. Blend for about 1-2 minutes, ensuring there are no mango chunks left.

4. Taste and Adjust:

  • Taste the Mango Lassi to make sure it’s as sweet as you like. If it’s too thick, you can add more milk to thin it out, and if it’s too sweet, you can add a bit more yogurt to balance the flavors.

5. Serve Chilled:

  • Pour the Mango Lassi into glasses and garnish with a slice of fresh mango or a pinch of ground cardamom if desired. You can also add a sprig of mint for extra freshness.

6. Enjoy:

  • Serve your homemade Mango Lassi immediately. It’s best when it’s cold and freshly blended. Sip and savor the tropical flavors.

Variations:

  • Add a scoop of vanilla ice cream for an extra creamy and indulgent Mango Lassi.
  • Experiment with different fruits like pineapple, strawberry, or banana for unique flavored lassis.
  • For a healthier version, you can substitute sugar with honey or agave nectar, and use low-fat yogurt or almond milk.

Mango Lassi is a delightful, sweet, and tangy drink that’s perfect for a hot summer day or as a refreshing accompaniment to your favorite Indian meal. It’s incredibly easy to make at home and a crowd-pleaser for all ages. Enjoy your culinary journey as you whip up this delectable Mango Lassi!

Ultimate Tartiflette Recipe Made with Love: A Savory French Delight

Ultimate Tartiflette Recipe Made with Love: A Savory French Delight

Ultimate Tartiflette Recipe Made with Love: A Savory French Delight

Introduction:

Tartiflette is a classic French comfort food that originates from the Savoie region in the French Alps. This dish is the epitome of hearty, cheesy, and indulgent cuisine. Made with just a handful of ingredients, it’s the perfect dish to warm your soul on a chilly evening. In this recipe, I’ll guide you through the steps to create an authentic Tartiflette that will transport your taste buds to the French Alps.

Ultimate Tartiflette Recipe Made with Love: A Savory French Delight

Ingredients:

For the Tartiflette, you’ll need:

  1. 2 lbs (900g) of waxy potatoes
  2. 1/2 lb (250g) of lardons (cubed bacon)
  3. 1 large onion, finely chopped
  4. 1 clove of garlic, minced
  5. 1 cup (240ml) of dry white wine (such as Chardonnay or Savoie wine)
  6. 1/2 cup (120ml) of heavy cream
  7. 1 Reblochon cheese (a semi-soft, creamy cow’s milk cheese)
  8. Salt and freshly ground black pepper to taste

Instructions:

Step 1: Prepare the Potatoes

1.1. Scrub the potatoes and peel them if desired. Slice them into rounds, about 1/4 inch (0.6 cm) thick.

1.2. Place the potato slices in a pot of cold, salted water and bring it to a boil. Cook the potatoes for about 5-7 minutes or until they are slightly tender but not fully cooked. Drain and set aside.

Step 2: Cook the Lardons and Onions

2.1. In a large skillet, cook the lardons over medium heat until they are crisp and have rendered their fat. Remove the lardons and place them on a paper towel-lined plate to drain, but keep the bacon fat in the skillet.

2.2. In the same skillet, add the chopped onions and garlic. Sauté them in the bacon fat until they are soft and translucent.

Step 3: Assemble the Tartiflette

3.1. Preheat your oven to 375°F (190°C).

3.2. In a large, ovenproof dish, layer half of the partially cooked potato slices. Season with salt and pepper.

3.3. Scatter half of the cooked lardons and sautéed onions over the potatoes.

3.4. Repeat with the remaining potato slices, lardons, and onions.

3.5. Pour the white wine over the layers, ensuring it’s evenly distributed.

3.6. Drizzle the heavy cream over the top.

Step 4: Cheese Layer

4.1. Cut the Reblochon cheese in half horizontally, creating two thin rounds.

4.2. Place the cheese rounds on top of the potato mixture, rind side up.

Step 5: Bake and Serve

5.1. Bake your Tartiflette in the preheated oven for about 25-30 minutes or until the cheese is melted and bubbly, and the top is golden brown.

5.2. Remove the Tartiflette from the oven and let it rest for a few minutes before serving.

Serving:

Tartiflette is traditionally served hot, straight from the oven. Scoop out generous portions onto plates, making sure to get some of the creamy cheese with each serving. Pair it with a crisp, green salad and a glass of white wine for an authentic French dining experience.

Conclusion:

Tartiflette is a beloved French dish that embodies the essence of comfort food. With its layers of creamy potatoes, crispy bacon, and melted cheese, it’s a true delight for your taste buds. Whether you’re planning a cozy dinner for family or want to impress your guests, this authentic Tartiflette recipe will surely be a crowd-pleaser. Bon appétit!

Crepes with Love: Crafting Ultimate Sweet and Savory Crepe Recipes

Crepes with Love: Crafting Ultimate Sweet and Savory Crepe Recipes

Crepes with Love: Crafting Ultimate Sweet and Savory Crepe Recipes

Introduction

Crepes are a delightful and versatile dish that can be enjoyed in a multitude of ways. Whether you prefer sweet or savory fillings, these thin, delicate pancakes are sure to please. In this blog post, I’ll guide you through the process of making perfect crepes with two delectable fillings. Let’s get started!

Basic Crepe Batter

Crepes with Love: Crafting Ultimate Sweet and Savory Crepe Recipes

Ingredients:

  • 1 cup all-purpose flour
  • 2 large eggs
  • 1 1/2 cups milk
  • 2 tablespoons melted butter
  • 1/4 teaspoon salt
  • 1 tablespoon sugar (for sweet crepes, optional)
  • 1/2 teaspoon vanilla extract (for sweet crepes, optional)

Instructions:

  1. Combine the Dry Ingredients: In a mixing bowl, whisk together the flour, salt, and sugar (if making sweet crepes).
  2. Mix Wet Ingredients: In a separate bowl, whisk the eggs and then add the milk, melted butter, and vanilla extract (if making sweet crepes). Mix until well combined.
  3. Combine Wet and Dry Ingredients: Gradually add the wet mixture to the dry ingredients, whisking continuously until you have a smooth, lump-free batter. Let it rest for at least 30 minutes to allow the flour to hydrate.
  4. Heat the Pan: Heat a non-stick skillet or crepe pan over medium-high heat and lightly grease it with butter or oil.
  5. Cook the Crepes: Pour a small amount of batter into the pan, swirling it around to coat the bottom evenly. Cook for about 1-2 minutes, or until the edges start to turn golden brown. Flip the crepe and cook for another 1-2 minutes.
  6. Repeat: Continue this process with the remaining batter, stacking the cooked crepes on a plate.

Now that we have our basic crepe batter ready, let’s explore two delicious filling options.

1. Sweet Nutella and Strawberry Crepes

Ingredients:

  • 1 batch of basic crepe batter
  • Nutella or hazelnut spread
  • Fresh strawberries, sliced
  • Powdered sugar, for dusting
  • Whipped cream (optional)

Instructions:

  1. Fill and Fold: Spread a generous amount of Nutella on the center of each crepe, add sliced strawberries, and fold the crepe in half and then in half again to form a triangle.
  2. Serve: Dust with powdered sugar and add a dollop of whipped cream if desired. Enjoy your sweet crepe!

2. Savory Spinach and Mushroom Crepes

Ingredients:

  • 1 batch of basic crepe batter
  • 1 cup fresh spinach, chopped
  • 1 cup mushrooms, sliced
  • 1 small onion, finely chopped
  • 2 cloves garlic, minced
  • 1 tablespoon olive oil
  • Salt and pepper, to taste
  • Grated Gruyère cheese (optional)

Instructions:

  1. Sauté the Vegetables: In a pan, heat the olive oil over medium heat. Add the chopped onion and sauté until translucent. Then, add the minced garlic, mushrooms, and chopped spinach. Cook until the vegetables are tender. Season with salt and pepper.
  2. Fill and Fold: Spoon the spinach and mushroom mixture onto each crepe and fold them into squares. You can add grated Gruyère cheese on top if desired.
  3. Serve: Plate your savory crepes and enjoy this delicious and healthy option!

These two crepe recipes showcase the versatility of this delightful dish. Whether you have a sweet tooth or prefer a savory treat, crepes are the perfect canvas for your culinary creativity. So, get ready to whip up these scrumptious crepes and savor every bite!

French Onion Soup: A Heartwarming Recipe with Love and Ultimate Flavor

French Onion Soup: A Heartwarming Recipe with Love and Ultimate Flavor

French Onion Soup: A Heartwarming Recipe with Love and Ultimate Flavor

Introduction:

French Onion Soup is a classic French dish known for its rich, caramelized onions, savory broth, and a blanket of melted cheese on top. This recipe is perfect for a cozy dinner or a fancy appetizer. Let’s dive into the details and create this delicious soup step by step.

French Onion Soup: A Heartwarming Recipe with Love and Ultimate Flavor

Ingredients:

For the Soup:

  • 4 large onions, thinly sliced
  • 2 cloves of garlic, minced
  • 4 tablespoons of unsalted butter
  • 1 tablespoon of olive oil
  • 1 teaspoon of sugar
  • 1 teaspoon of salt
  • 1/2 teaspoon of black pepper
  • 2 sprigs of fresh thyme
  • 2 bay leaves
  • 1/2 cup of dry white wine
  • 8 cups of beef broth
  • 1 French baguette, sliced
  • 2 cups of Gruyère cheese, grated
  • 1/2 cup of Parmesan cheese, grated

Instructions:

1. Caramelize the Onions:

  • In a large, heavy-bottomed pot, melt the butter and olive oil over medium-low heat.
  • Add the thinly sliced onions and stir well.
  • Sprinkle with sugar, salt, and black pepper. Cook, stirring occasionally, for about 45-60 minutes until the onions are soft, deeply caramelized, and have a rich brown color.
  • Add minced garlic, thyme, and bay leaves. Cook for an additional 5 minutes.

2. Deglaze with White Wine:

  • Pour in the white wine to deglaze the pot, scraping up any browned bits from the bottom.
  • Allow the wine to cook for a few minutes until it’s mostly evaporated.

3. Add Beef Broth:

  • Pour in the beef broth and bring the mixture to a simmer.
  • Let it simmer for about 30-40 minutes to allow the flavors to meld. Remove the thyme and bay leaves when done.

4. Toast the Baguette:

  • Preheat your oven to 350°F (175°C).
  • Place the baguette slices on a baking sheet and toast in the oven until they’re golden and crisp.

5. Assemble and Serve:

  • Ladle the hot soup into oven-safe bowls.
  • Place a slice of toasted baguette on top of the soup.
  • Sprinkle a generous amount of Gruyère and Parmesan cheese over the bread.

6. Broil the Soup:

  • Preheat your broiler.
  • Place the bowls on a baking sheet and put them under the broiler for a few minutes until the cheese is bubbly and golden brown.

7. Serve Hot:

  • Carefully remove the bowls from the oven (remember, they will be hot).
  • Garnish with fresh thyme or parsley, if desired, and serve your delicious French Onion Soup immediately.

Enjoy your Homemade French Onion Soup!

This French Onion Soup is a wonderful combination of sweet caramelized onions, rich beef broth, and the delightful crunch of toasted baguette topped with melted cheese. It’s the ultimate comfort food that will warm your heart and soul on a cold day. Bon appétit!

Crafting a Ploughman's Lunch with Love: The Ultimate Recipe Guide

Crafting a Ploughman’s Lunch with Love: The Ultimate Recipe Guide

Crafting a Ploughman’s Lunch with Love: The Ultimate Recipe Guide

Introduction:

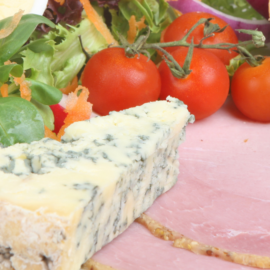
The Ploughman’s Lunch is a hearty and rustic British meal that celebrates simple, high-quality ingredients. It’s the perfect blend of flavors and textures, offering a delightful mix of fresh and tangy elements. In this guide, we’ll walk you through creating the ultimate Ploughman’s Lunch.

Crafting a Ploughman's Lunch with Love: The Ultimate Recipe Guide
Crafting a Ploughman’s Lunch with Love: The Ultimate Recipe Guide

Ingredients:

  • Cheeses:
    • Mature Cheddar
    • Stilton
    • Red Leicester
  • Proteins:
    • Slices of Ham
    • Boiled Eggs
  • Breads:
    • Crusty Baguette
    • Wholemeal Bread
  • Vegetables:
    • Cherry Tomatoes
    • Cucumber Slices
  • Pickles and Condiments:
    • Branston Pickle
    • Pickled Onions
    • Dijon Mustard
  • Extras:
    • Fresh Apples
    • Celery Sticks
    • Radishes

Instructions:

1. Arrange the Cheeses:

  • Place slices of Mature Cheddar, Stilton, and Red Leicester on a platter or wooden board. Allow them to come to room temperature for the best flavor.

2. Prepare the Proteins:

  • Slice the ham and arrange it alongside the cheeses.
  • Cut the boiled eggs into halves or quarters, depending on your preference.

3. Select Your Breads:

  • Offer a selection of crusty baguette and wholemeal bread, cut into bite-sized slices or pieces. Toasting the bread is optional but adds extra crunch.

4. Slice the Vegetables:

  • Cut cherry tomatoes in half.
  • Slice cucumbers into thin rounds.

5. Pickles and Condiments:

  • Place Branston Pickle, pickled onions, and Dijon mustard in small dishes or ramekins.

6. Add Some Extras:

  • Include fresh apple slices for a refreshing, sweet contrast.
  • Add celery sticks and radishes for a bit of crunch and color.

7. Presentation:

  • Arrange all the components on a large platter or individual plates, creating an enticing display.

8. Serve:

  • Serve the Ploughman’s Lunch with a cold beverage of your choice, such as a crisp cider or a refreshing iced tea.

Enjoy your Ploughman’s Lunch!

Variations and Tips:

  • Feel free to customize your Ploughman’s Lunch with your favorite cheeses, cold cuts, or condiments.
  • For a vegetarian version, omit the ham and add more varieties of cheese or some falafel.
  • You can also include some salad greens or coleslaw as a side dish for a fresher touch.
  • Ploughman’s Lunch is perfect for picnics or as part of a platter for a casual gathering.

The Ploughman’s Lunch is all about combining flavors and textures to create a satisfying and uncomplicated meal. Enjoy the blend of sharp cheeses, savory meats, and tangy pickles with each delightful bite. It’s a classic British dish that never goes out of style!

Crafting Cornish Pasties with Love: An Ultimate Recipe for Hearty Delights

Crafting Cornish Pasties with Love: An Ultimate Recipe for Hearty Delights

Crafting Cornish Pasties with Love: An Ultimate Recipe for Hearty Delights

Introduction:

Cornish pasties are traditional hand-held pies hailing from Cornwall, England. These savory treats are packed with hearty fillings and encased in a flaky pastry crust. Follow this detailed recipe to create a taste of Cornwall in your own kitchen, Crafting Cornish Pasties with Love: An Ultimate Recipe for Hearty Delights.

Crafting Cornish Pasties with Love: An Ultimate Recipe for Hearty Delights

Ingredients:

For the Pastry:

  • 2 1/2 cups all-purpose flour
  • 1/2 tsp salt
  • 1 cup unsalted butter, cold and cubed
  • 1/2 cup ice-cold water

For the Filling:

  • 1 lb (450g) beef skirt or chuck, diced
  • 1 lb (450g) russet potatoes, peeled and diced
  • 1/2 cup rutabaga (swede), peeled and diced
  • 1/2 cup onion, finely chopped
  • 1/4 cup fresh parsley, chopped
  • Salt and pepper to taste

Instructions:

Part 1: Making the Pastry

  1. In a large mixing bowl, combine the flour and salt. Add the cold, cubed butter.
  2. Use a pastry cutter or your fingertips to work the butter into the flour until it resembles coarse breadcrumbs.
  3. Gradually add the ice-cold water and mix until the dough comes together.
  4. Divide the dough into four equal portions, shape them into discs, wrap in plastic wrap, and refrigerate for at least 30 minutes.

Part 2: Preparing the Filling

  1. In a separate bowl, mix the diced beef, potatoes, rutabaga, chopped onion, and parsley. Season with salt and pepper to taste.

Part 3: Assembling the Pasties

  1. Preheat your oven to 400°F (200°C) and line a baking sheet with parchment paper.
  2. Take one of the pastry discs and roll it out on a floured surface to about 8-10 inches in diameter.
  3. Place a portion of the filling mixture on one-half of the pastry round, leaving a border around the edge.
  4. Fold the other half of the pastry over the filling to create a semi-circle shape.
  5. Crimp the edges to seal the pasty. You can use a fork or pinch the edges with your fingers.
  6. Repeat this process for the remaining pastry discs and filling.

Part 4: Baking the Pasties

  1. Place the pasties on the prepared baking sheet.
  2. Beat an egg and brush it over the tops of the pasties for a golden finish.
  3. Bake in the preheated oven for 45-50 minutes or until the pasties are golden brown and the filling is cooked through.
  4. Remove from the oven and let them cool for a few minutes.

Serve and Enjoy:

Your homemade Cornish pasties are ready to be enjoyed! These make for a perfect lunch, snack, or picnic treat. The golden, flaky crust and flavorful filling are sure to delight your taste buds.

Note: Cornish pasties can be made with various fillings, so feel free to get creative with your favorite ingredients. Enjoy your culinary journey to Cornwall!

Bean-and-Vegetable-Stew

Bean and Vegetable Stew Recipe: A Labor of Love for Ultimate Comfort

Bean and Vegetable Stew Recipe: A Labor of Love for Ultimate Comfort

Introduction:

Warm, nutritious, and comforting, a hearty bean and vegetable stew is the perfect dish for a cozy night in. Packed with wholesome ingredients, this stew is not only delicious but also incredibly healthy. In this blog post, we’ll guide you through the process of creating this delightful dish step by step.

Bean and Vegetable Stew Recipe: A Labor of Love for Ultimate Comfort

Ingredients: For this recipe, you will need the following ingredients:

For the Stew:

  • 1 cup of dried beans (your choice – black beans, kidney beans, or navy beans)
  • 4 cups of vegetable broth
  • 2 cups of water
  • 1 medium onion, diced
  • 3 cloves of garlic, minced
  • 2 carrots, peeled and sliced
  • 2 celery stalks, sliced
  • 1 bell pepper, diced
  • 1 zucchini, diced
  • 1 cup of diced tomatoes (canned or fresh)
  • 1 cup of corn kernels (frozen or canned)
  • 1 tsp of olive oil
  • 2 tsp of ground cumin
  • 1 tsp of paprika
  • Salt and black pepper to taste

For the Seasoning:

  • 1 bay leaf
  • 2 sprigs of fresh thyme
  • 1 tsp of dried oregano
  • 1/2 tsp of red pepper flakes (adjust to your spice preference)

Optional Toppings:

  • Fresh parsley, chopped
  • Grated cheese (vegan or dairy, as preferred)
  • Crusty bread for dipping

Instructions:

Step 1: Prepare the Beans

  1. Rinse the dried beans thoroughly under cold water to remove any debris.
  2. Soak the beans in water overnight to soften. If you’re short on time, you can use the quick soak method by bringing the beans to a boil, then letting them sit for one hour.

Step 2: Sauté the Aromatics

  1. Heat olive oil in a large, heavy-bottomed pot over medium heat.
  2. Add the diced onions and minced garlic. Sauté until the onions turn translucent, about 3-5 minutes.

Step 3: Add Vegetables and Spices

  1. Add carrots, celery, bell pepper, and zucchini to the pot. Sauté for another 5 minutes or until the vegetables begin to soften.
  2. Sprinkle ground cumin, paprika, and red pepper flakes over the vegetables. Stir well to coat the vegetables evenly with the spices.

Step 4: Combine Beans and Broth

  1. Drain and rinse the soaked beans.
  2. Add the beans, vegetable broth, water, diced tomatoes, corn, bay leaf, fresh thyme, and dried oregano to the pot. Stir to combine all the ingredients.

Step 5: Simmer and Cook

  1. Bring the mixture to a boil, then reduce the heat to low.
  2. Cover the pot and let the stew simmer for 1.5 to 2 hours, or until the beans are tender and the flavors meld together. Stir occasionally.

Step 6: Season and Serve

  1. Remove the bay leaf and thyme sprigs.
  2. Season the stew with salt and black pepper to taste.
  3. Serve hot, garnished with fresh parsley and grated cheese, if desired. Don’t forget the crusty bread for dipping!

Conclusion:

This Bean and Vegetable Stew is not only a hearty and wholesome meal but also a versatile one. You can easily adapt it to your taste by adding your favorite vegetables or adjusting the level of spiciness. It’s perfect for a chilly evening or for batch cooking to enjoy throughout the week. Try this recipe, and you’ll have a nutritious and comforting meal in no time!

Crafting Love on a Plate: The Ultimate Welsh Rarebit Recipe

Crafting Love on a Plate: The Ultimate Welsh Rarebit Recipe

Crafting Love on a Plate: The Ultimate Welsh Rarebit Recipe

Introduction:

Welcome to my culinary corner! In this blog, we’re about to embark on a delicious journey to the heart of British comfort food with a classic dish – Welsh Rarebit. Whether you’re a cheese aficionado, a fan of hearty breakfasts, or simply someone who appreciates simple, yet incredibly flavorful recipes, you’re in for a treat, Crafting Love on a Plate: The Ultimate Welsh Rarebit Recipe.

Crafting Love on a Plate: The Ultimate Welsh Rarebit Recipe

Welsh Rarebit, often referred to as the “posh cheese on toast,” is a dish with humble origins but offers a rich, indulgent experience. It’s the kind of comfort food that warms your soul and satisfies your taste buds in one gooey, cheesy bite.

Ingredients:

  • 4 slices of hearty bread (traditional choices include sourdough or whole wheat)
  • 2 cups sharp cheddar cheese, grated
  • 1/2 cup dark beer (such as stout or ale)
  • 2 tablespoons unsalted butter
  • 1 tablespoon all-purpose flour
  • 1 teaspoon English mustard
  • 1 teaspoon Worcestershire sauce
  • Salt and freshly ground black pepper to taste
  • Chopped fresh chives or parsley for garnish (optional)

Instructions:

1. Prepare the Toast

  • Start by toasting the bread slices until they are crispy and golden. You can use a toaster or the broiler in your oven for this.

2. Create the Cheese Sauce

2.1. Make the Roux

  • In a medium-sized saucepan, melt the butter over medium heat. Once it’s fully melted, add the all-purpose flour and whisk continuously until it forms a smooth paste. This is your roux, which will thicken the cheese sauce.

2.2. Add Beer and Cheese

  • Slowly pour in the dark beer while continuing to whisk the roux. Let it simmer for a minute or two to cook off the alcohol.
  • Gradually add the grated cheddar cheese, stirring constantly until the cheese melts and the sauce becomes smooth and velvety.

2.3. Flavor the Sauce

  • Stir in the English mustard and Worcestershire sauce. Season the sauce with salt and freshly ground black pepper to taste. Adjust these seasonings to your preference.

3. Assemble and Serve

  • Preheat your broiler on high.

3.1. Load the Toast

  • Place the toasted bread slices on a baking sheet or ovenproof dish.

3.2. Top with the Cheese Sauce

  • Spoon the hot Welsh Rarebit cheese sauce generously over each slice of toast, ensuring they are evenly covered.

3.3. Broil Until Bubbly and Golden

  • Place the Welsh Rarebit under the broiler and watch it closely. Allow the cheese sauce to bubble and turn a beautiful golden brown. This should take about 2-3 minutes, but keep a close eye to prevent burning.

3.4. Garnish and Serve

  • Remove from the broiler and, if desired, sprinkle with chopped fresh chives or parsley for a pop of color and flavor.

4. Enjoy!

  • Serve your Welsh Rarebit immediately while it’s hot and bubbling. It’s delightful on its own or with a side salad.

Variations:

  • Seafood Rarebit: Add cooked shrimp or crab meat to the cheese sauce for a seafood twist.
  • Vegetarian Rarebit: Omit any meat and consider adding sautéed mushrooms or spinach for a vegetarian version.
  • Spicy Rarebit: Add a pinch of cayenne pepper or hot sauce to the cheese sauce for some heat.

Feel free to get creative with your Welsh Rarebit recipe and adapt it to your preferences. Enjoy this comforting, cheesy delight!